Automox Install MacOS
This is the installation guide for the MacOS package of Automox. We will begin by downloading the agent from here https://console.automox.com/installers/AutomoxAgent-1.44.8.pkg.
After the agent is download you can proceed to run the package installer (by default is in your Downloads Folder):
Upon opening the pack you will be greeted with a prompt asking you to allow the installer to check the hardware of the device:
After the installer confirms you are able to install Automox we can proceed through the installer by pressing Continue:
On this page we can again press Continue:
This will give you a pop up prompting you to read the Terms of Services, press Agree to continue with the installation:
Here you will enter the access key provided to you in the an email, paste the key in and press continue:
We are going to install for all users, press Continue:
We are going to use default installation path, press Install:
After you press installed you will be prompted for User Access Control, press Use Password:
Enter your password and press Install Software:
Automox will begin installation wait a few minutes:
After a few minutes the installation will be completed and we can close out of the Installer:
Mac will ask if you would like to discard the installer, you can opt to keep the installer if you wish. We would recommend moving to trash.
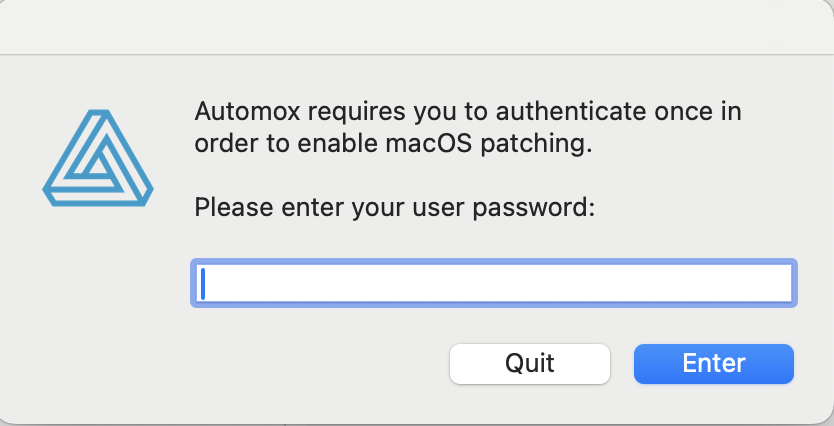
On newer Mac devices Automox will prompt you (this is upon next scan
normally when you first login the next day but could be very shortly
after) to enter your password again in a pop up panel that looks like
this:

After the password is entered in this box and you press enter, Automox is fully installed with the proper permissions.
Related Articles
Automox Install MacOS Command Line
Automox installation requires admin level access to the machine. If every user has admin level access to the machine in your environment, they are able to install this product on their machine without the help of the IT team following these steps: ...